Thursday, May 10, 2012

Days 2, 3 & 4

The distractions of Life and Construction plague me.  For the last three days the roofers have invaded my house and my time, along with a rainstorm that they watched from their truck.  They finished today, but still have to cleanup.    Though the interruptions, I have continued to test equipment and sort my workshop.  I also think have exceeded a dozen visits to the hardware in the past three days, getting fasteners for tripods and support systems, extension cords and other items.   I also finally got a chance to go visit the lumber mill.  It is finally coming into focus.

Wood Sheds at Saunders Supply in Suffolk Virginia
I had been given a point of contact by by builder, Rick Stageberg of Lakewood Builders for the folks at Saunders Supply Company in Suffolk http://www.saunderssupplycosuffolk.net/ , where they actually mill some or their own wood.  I was excited to find out they had rough cut 6x6s in stock, but needed to go look at them to see if I could handle the natural camber and twists of rough cut wood.  Unfortunately this design is not very tolerant of dimension problems and I do not have the ability to plane timbers to deal with irregularities.  After discussions with Sam and Hayden and looking at the materials, I decided to go with grade 1 6x6s which they had in stock.  The 16 foot timbers they sell are Grade 1, and initially untreated which was my preference so that I don't have to breath in chemicals as I notch the timbers.  I'll post treat the timbers with a sealer after the preparation, and since none of the main frame touches the ground I will only use treated timbers for the foundation supports.  The great news is that I finalized the first order while there and they will be delivered Monday or Tuesday along with the first draw of other lumber and plywood that is used to make the prototype panels, floor joists, shoring, and the lifting tripods. I've made the commitment and stroked the check. No turning back now. 

By the way, the design is resolving itself in interesting ways.  I had an "ah ha" moment yesterday as I finally realized that I could solve the panel design issues having to fit in different size height and width modules by utilizing an asymmetric design.  One that rotates the panel 90 degrees to fit alternate layout modules.  I realize that this makes no sense to you the reader, but trust me, it has been driving me crazy.  All will be revealed as I show the final design in later blogs.

Monday, May 7, 2012

Day 1

Today, May 7th was day one in my book.  Although I had the day off on Friday, it started at the dentist's office, and continued with the unpacking and sorting of tools and materials.  The night before we actually moved the boat out of the garage to a storage location so I could claim the garage for the next 6 weeks.  Frankly moving workbenches and toolboxes and preparing continued through the weekend.  Today seemed to be much of the same.  I also started a new version of the virtual model on AutoCAD for Mac, which I will show as it gets finalized.   Replacing a broken Jigsaw from the weekend, this project also seems like a an opportunity to replace my "starter" tools with some that will be more robust for the task at hand.  Besides a new 1/2 drill and a better jigsaw, there are actually a few tools that are quite special for this project.

After Fed-Ex Day, I had envisioned a large radial arm saw, with a dado blade as the best way to cut the notches in the timbers.  I never could fully resolve if the radial arm saws could accept a dado, but during me research I discovered some new friends at TimberWolf Tools.  I had imagined that moving the timbers to make the multiple cuts on a radial arm would be difficult, and when I discovered the Hema Notcher, it became obvious that moving the saw was the better solution, especially one made for timber construction rather than the "rig" I was contimplating putting together.  
So top on the list of special tools is the HEMA ZF215W Tenon Cutter / Notcher.  It uses what I would describe as a flywheel with chipper blades to notch the timbers.  I purchased the two blades, one that would cut the deeper notch and one that is 40 mm to cut a notch for 2x6s to set into.  The beast came from Germany, and had to be special ordered.  It actually arrived last Thursday., after about a 4week lead time.  I still have to cut off the european plug and replace it with a US standard 230v 20 amp plug so I can power it up.   Special thanks to Marc Boutan and David Powell of Timberwolf Tools for helping me with all the variables.  http://www.timberwolftools.com/tools/hema/H-ZF215W.html  There will be lots of shots of this saw as i move forward.  It is the key tool for making the notches, instead of the traditional chisel and mallet, which when you see the extent of the work would take me a year. 


Next up is a Makita 5402NA 16-5/16" Beam Saw.  This puts all circular saws to shame.  It is huge, but makes simple time of the 6x6s that make up the timbers for the project.  I could have possible gotten away with a chainsaw beam saw. or cutting the beam and flipping it for another cut, but those that know me know I would prefer to to it right and this is the saw for the purpose.  Anyone cutting 6x6s on a regular basis seems to use this saw.   You can source the saw from a number of  places, and even find free shipping.
Barr Tools Framing Chisel
Whiteside Upcut Spiral R
Makita 16 inch Beam Saw


There will always be some chisel work on a project like this, so the next key tools are a new 1-1/2" barr framing chisel and weighted mallet.  My research indicates that these are the best chisels made in the US, and many swear by them.  http://barrtools.com   I admit there are others, including quality ones from England, but my shot out goes the the excellent service I received directly from the source at Barr Tools.  Equally interesting was the Garland Weighted Rawhide Mallet  (40oz.) I also received.  It is a spiral of rawhide with a lead core.  a nice balance of natural materials and weight.


Some of the notches will be shallow and easier to cut with a few passes of a router.  The best I found for that work is an uncut spiral router bit.  The best source, for the best quality seems to be Whiteside. http://www.whitesiderouterbits.com/


WoodOwl Ultra Smooth Auger
Lastly in this round of discussions on tools are the Woodowl bits I ordered.  The Ultra Smooth Ship Augers actually have three spurs, and are balanced well for fast clean cuts.  www.woodowl.com  I will be using them for the interlocking wood dowels used to hold panels in place.

Wednesday, May 2, 2012

Fedex-day

My team within Autodesk experimented with a concept that is called Fedex-day, which translated as a one day project that absolutely without exception had to happen in 24 hours and be completed. The team all did this on the same day. We unplugged from our normal daily routine, were not allowed to schedule any meetings or calls, turned off our email and hid our phones. Our task was to come up with a one day project, that at we could execute within 24 hours, then document it and report out to our team the next morning. It could be any topic, but it had to result in something. You could not use it as an excuse to sleep all day.

We had team members who did videos, one that wrote a short story, one that created a database of worldwide relationships, and others that created new ways of engagement for the team. My project became the kickoff of my dream. I had been wondering about how to execute the burr puzzle cabin, and always realized the most critical step was the execution of the corner. The corner is a six-piece burr that is replicated 8 times to form the main frame of the cabin. It is the first key and arguably the most complex of the joints. If I could create this joint, then I could create the cabin. So my Project for FEDEX day was born.

I had already determined at the most practical working size for the frame were 6x6s mainly because of the weight of a 16 foot long timber which was the most practical and readily available size to use for the first cabin. An 8x8 of the same length was simply to heavy to handle, and probably overkill. So I picked up a few 6x6 wood posts which is the only material needed and pondered the process.

There are two fundamental cuts in any notchable burr. One is a notch the width of the "post" by half its width and the other is half its width by half its width. That is to say in this case 5.5 by 2.75 inches and 2.75 by 2.75 inches since a nominal 6x6 is actually 5.5 inches. With this combination all the notch combinations can be made.

On a small puzzle this can be done with repeated cuts on a table saw, a dado blade or a router. On a larger scale, the typical method for timber appeared to be to cut relief cuts the width of the final notch and then chisel the remainder of the notch to clean it. Therefore I needed a saw that could cut 2.75 inches deep. I could not bring myself to use a hand saw unless it was the last resort. I needed a 10 inch circular saw. A task easy to find at the contractor rental stores. Well easier said than done. I called everyone, and no where in my area was anything like this available to rent. So I looked for local stores to buy one, and that was a lost cause also. No one could get me one in time for Fedex-day. The hand saw was looking better at this point.

But alas, after moaning about how strangely hard it was to find a saw, my brother discovered a friend of his that had a 12 inch circular saw. My backbreaking work with a handsaw was avoided, but then the beast showed up. It was huge. The biggest saw I have ever seen. (Even though now have a 16 inch saw, but that is a different blog post.) The saw was the key, and Fedex-day day arrived, with me ready to go.

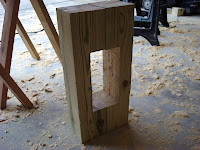
I think there is no need to write about the process since I can show you it all in pictures. I placed them in order below and you can follow the details picture by picture.


My Conversation Starter On My Front Porch
The result was a big puzzle, but the key to a bigger process. It stood on my front porch for a while, then my back deck and now that I have a model shop, it is the first thing you see as you ascend the stairs. I knew that this trial run would teach me some valuable lessons, so here they are:
  • The accuracy of the depth of the cuts was critical, and this large saw was not designed to have good control over the depth.  It was hard to adjust and slipped over time.
  • A big chisel is needed. A 2.5 inch one would be ideal. Even bigger would work best in the wide notches.
  • The routing of the 45 degree chamfer cleaned up the world of sins, and uneven depth of cuts.
  • Getting the saw aligned and stable was critical.  In the end, even after the modification of the Krebs guide to make it as long as possible, it was too small to guide the saw.
  • Creating a layout jig will be helpful when doing multiple cuts in the future.

Tuesday, May 1, 2012

The Main Corner Burr

The Burr Tools Design Interface
There are thousands of ways to make a six-piece burr, but admittedly I was only looking for one.  It needed to be construct-able with reasonable methods.  In a puzzle the rod is maybe a few ounces, but in this timber frame it is about 130 lbs for a 16 foot, 6x6.  Not at all easy to manipulate 8 feet in the air.  This is especially true when you consider that in many burrs the rest of the burr has to be moved as a whole, as the parts slide together.  The other consideration is to try to find the strongest members passing through the burr joint, that will take the load of the floor joists or roofs.
Solution (in Yellow), 1 Blue, 1 Green, 2 Red, 2 Cyan

After modeling many alternatives, this is the current solution.  It utilizes vertical rods that can be braced, a main horizontal rod that locks the first pairs in place and then two other horizontal rods that lock that level in place and finally a single solid rod that slides into place which locks the whole burr.  By many standards it would not be too interesting of a burr made as a small puzzle, but it is just right at the scale of an assembled timber frame.  I sketched and modeled the burr in different ways, but one of the best ways is a software tool call Burr Tools, and I used it here to illustrate the burr I am using in the Burr Puzzle Cabin.
The solution for the burr
www.burrtools.soureforge.net
The next step is to build the burr and test the theory, which I got a chance to do during Fedex-day, which I will show in a separate post.


Monday, April 30, 2012

My Mr Puzzle Limited Edition Burr

Lost Day, 2001 Limited Edition, Mr Puzzle
I had seen sketches of a 8 burr bounding frame before, but never actually seen one constructed until Brian Young, aka Mr Puzzle of Australia, created one in 2001 as a special edition.  This was one of my first special editions from Brian, and I have been collecting them ever since.

The puzzle is nicknamed "Lost Day", based on the time it will take to solve it.  Many people joke it is more like a lost weekend.  To quote Brian's website: "David Bruce designed this puzzle in 1985 and although he designed it by hand he did later have a computer check it’s assembly to ensure it was unique.  ...  The goal of the design was to make sure each of the eight corners was a different burr and that all were notchable burrs with no key piece".   The special editions for this puzzle are long gone, and about the only way to acquire one would be to find it on ebay or and auction site, or as many craftsmen might want to do, simply make it yourself.
 
AutoCAD for Mac Model of the Lost Day
This became one of the first puzzles that really inspired my thinking about making a habitable space.  The fact that each burr in "Lost Day" is different makes it nearly impossible to do at the scale of a timber frame, because it would be very difficult to raise and slide the timber and frame as you manipulate the puzzle.  This is easy when the sticks are a few ounces, but not when a 6 x 6 by 16 feet at about 130 lbs each.  On the Burr Puzzle Cabin, I made the burrs the same and designed them to be able to be assembled in a logical sequence, but when constructed it looks exactly like the "Lost Day" with 8 burrs.  Well actually the Burr Puzzle Cabin has evolved to 16 burrs when I added the roof structure. As you will see, it has become a lot more complicated.

Sunday, April 29, 2012

My Burrs

I have collected many burr and burr-like puzzles over the years. They include false burrs such as the three piece burr which actually is more of a kumiki puzzle than a burr, to a great grandpapachuck which has 150 pieces. Here are a few of my favorites.  I'll add more in other blogs to give you a flavor of the variety.


"Leaning Tower of Altekruse" by Stewart Coffin

"Decemburr" by Brian Young, aka Mr Puzzle
"Vertigo" by Pentangle

"Windmill Burr", designed by Junichi Yananose, crafted by Brian Young, aka Mr Puzzle

"Visible Burr" Designed by Bill Cutler, crafted by Brian Young

"The Big Crystal"

Saturday, April 14, 2012

My Puzzle Collection

Part of My Puzzle Collection
I have been collecting puzzles for almost 50 years.  That of course includes the first Kumiki puzzles given to me as a child by my parents.  In the early days that was about it, obviously limited by opportunity, knowledge and most of all funding.

The second wave came after starting my profession as an architect, and moving to Madrid, Spain.  Traveling within Spain, the UK and Italy helped be rediscover puzzles.  It was trips to London and buying the Pentangle puzzles in Hamleys that got me truly hooked.  Most of Pentangles puzzles were burrs or a type often referred to as a chuck.  I collected most of what they had that over a few years of consistent travel to London.

Special and more LE Puzzles
And then the internet!  This single tool transformed my collection as I am sure it did for many reading this.  It was the combination of Ebay and individual sites that allowed my collection to expand.   In the beginning I was not the purist that I am now, but I did try to limit it to unpainted puzzles made of wood. So I do have some jigsaw types, string puzzles and oddities but I continued to find the burrs were my favorite.

I have about 180 or so now in my collection, ranging from about 2 x 2 inches up to 3 feet by 3 feet.  Most to them I have disassembled and assembled.  I will have to admit here publicly that I do have some puzzles that I have not dared to fully take apart as I doubt if I have the time or patience to be able to figure out how to put them back together.  They are beautiful pieces that I cherish and guard from the disassembling hands of my grandchildren.

Sunday, April 8, 2012

My Favorite 15 Puzzle Sites

My collection of puzzles grew once I began to travel to countries in Europe and had an opportunity to find special stores, like Hamley's in London.  But the real passion blossomed with the growth of the internet and tools such as Ebay that helped create a worldwide marketplace.  The best puzzles are not mass produced, and are not in your local stores, and are often made in limited production by skilled craftsmen worldwide.  The internet has been a way to share information and bind together a worldwide community of creators, collectors and enthusiasts.  Though my list is long (a few hundred links) and in seemingly constant flux, here is my attempt to list and organize some of my favorite puzzle sites.

Okay I give up... this is a taste of the sites.  Many others have made a job of sorting and organizing them and I will not attempt to duplicate there feat.  I actually went back through this list and reduced the number of entries on this list three times, to give you my top 15.   The title of this blog started as my "Top puzzle sites", then "My top 40 puzzle sites", and finally "My top 15".  Lol   Happy surfing!

Resources:

The best puzzle site, without equal, has been Puzzle World at http://www.johnrausch.com/puzzleworld/.  This site was created by John Rausch, and is a fantastic collection of images that spans the collection of puzzles.  Although it has not been heavily updated in recent years, it is still a repository of the best work available over the last few decades.

Puzzle Place is the best wiki out there that I have found, and is continually updated.  Anything you want to know is probably on or linked from this site. The gallery alone has 2300 puzzle images. I think this is the current best source of information. : http://www.puzzle-place.com/wiki/Main_Page

The Puzzle Museum:  http://www.puzzlemuseum.com/

IBM's Burr Site: http://www.research.ibm.com/BurrPuzzles/

It is all about the geometry: http://www.puzzleman.com/

And More Geometry, in this case VRML: http://www.polyhedra.jp/index-e.html


Puzzles for Sale: 

In my opinion Mr Puzzle, of Australia, is one of the best sources for quality burr puzzles.  Brian and Sue Young have given me years of wonderful service and fantastic puzzles, especially the limited editions that Brian has made over the years.  http://www.mrpuzzle.com.au/  You will see in a future blogs that they have played a special role in my inspiration.

Bill Cutler's Burr site, which is one of the best designers and craftsman in the market world:  http://home.comcast.net/~billcutler/index.html 

I first discovered Pentangle Puzzles in Hamleys of London, before the internet:  http://www.pentanglepuzzles.co.uk/

On of the best sources for Kumiki Puzzles:  http://www.cleverwood.com/

A great site for reselling your puzzles and open discussions: http://www.cubicdissection.com/

Puzzle Software:

This free software has really improved over the years.  if you are a serious designer or enthusaist you have to have this tool.  and of course please donate to the cause. : http://burrtools.sourceforge.net/

Blogs

My new favorite puzzle blog, Brian's Damn Puzzle Blog, has lead me to many other bloggers on puzzles: http://mechanical-puzzles.blogspot.com/

Puzzle Organizations:

The Nederlandse Kubus Club or "Dutch Cubist Club" is a club of puzzle-enthusiasts founded in 1981. : http://cff.helm.lu/

Puzzling Art

Great bronze puzzling sculptures.  A fantastic example of digital metal printing:
http://bulatov.org/

Saturday, April 7, 2012

Defining Puzzles

Of course "Puzzle" can be a verb or a noun, with the verb often being the action intended my the object which is the noun.  Puzzling thought I think.

I also think the value of a puzzle in not in the passage of time it takes to solve it, but rather the critical thinking it takes to solve it.  In the case of a 3 dimensional puzzle, it exactly the challenge that as a young child honed the skills and desires I had to become an architect.  I think I owe my career as an architect to the first cube kumiki puzzle given to me by my parents.  As architecture is often thought to be the blend of art and science,  I think puzzles, especially the 3D wooden puzzles I collect, are the blend of Art and Mathematics.  And of the thousands of types of puzzles that exist, I find myself gravitating always to the beautiful, sustainable, precision wooden burrs, that to me are "Architecture in my Hand".

Jerry Slocum and Jack Boterman, 1986
The first person to truly understand puzzles was Professor Hoffman, in his book Puzzles Old and New published in London in 1893 where he first tackled the classification.  Jerry Slocum and Jack Boterman later focused specifically on Mechanical puzzles in 1986 with the publication of Puzzles Old and New.  Their book established one of the the primary classification systems that is still in place today.

Most of the puzzles that I have always collected fall under either put-together aka assembly; take-apart aka disassembly;  or Interlocking Puzzles.   Burr Puzzles can almost always be considered as interlocking.  The current Wikipedia site at the time of this post has a simple description at  http://en.wikipedia.org/wiki/Mechanical_puzzle .  An interlocking puzzle is described as one or more pieces holding the rest together, or the pieces are mutually self-sustaining. They range from two pieces to hundreds of pieces and can be simple to almost impossible.  

While the classification of puzzles is not necessary to enjoy them, the mathematical minds that create them will always seek order from chaos.  For a  deeper dive into classification there are other sites that have interpreted it to greater levels of precision:

Wood Puzzles by Karin & Jürg von Känel, which has a reprint of Jerry Slocum's 11 division classification - http://www.woodpuzzles.com/puzzles_class_slocum.html 

The Puzzle Museum by James Dalgety, which shows his 14 division classification with Edward Hordern in 1999, including a graphical summary - http://puzzlemuseum.com/class/class01.htm

And lastly, the most detailed is Rob Stegmann's Puzzle Page that tries to make sense of it all and aligns all the major classifications since Hoffman's book into one huge matrix - http://home.comcast.net/~stegmann/classif2.htm 

Friday, April 6, 2012

The Six-Piece Burr Puzzle


1928, Bruce Publishing Company
The root of the burr puzzle is the six-piece burr puzzle.  An interlocking puzzle of 6 rods, with 2 on each axis at 90 degrees to each other.  The puzzle is known to date back to the 18th century and was produced in both Asia and Europe.  Six-piece burrs are also documented in the Bestelmeier Toy catalog from 1803.  According to the IBM research the first US patent was issued in 1917 for a burr puzzle.  Edwin Wyatt published Puzzles in Wood in 1928 documenting the construction of multiple burrs, and this book is still in reprint today.  Although burrs now can be found with odd solutions, ropes, magnets and pegs to complicate them, the purist puzzler knows the best are the simplest, in high precision notched wood.  Bill Cutler is the modern father of the burr puzzle having written his paper in 1978 that showed that there were 25 possible notchable pieces that can be put together in 314 ways.  A notchable piece  can be cut on a table saw with no inside corners.  Once you expand the concept to non notchable pieces, which require a chisel to notch and inside corner, there are 369 pieces in total and the possible solutions escalates to 119,979 ways to make a solid burr.  in all these cases a solid burr is one where there are no empty internal spaces in the assembled puzzle.  Once you begin to analyze non-solid burrs, as Bill Cutler did in the 80s through the mid 90s, the combinations become astronomical numbering about 35 billion and requiring multiple moves to even separate the first piece.  The masters of today's Burr puzzles, still include Bill Cutler, joined by Stewart Coffin, Philippe Dubois, and Peter Marineau.  Many other have now come up with wonderful designs expanding from the simple six-piece burr  to ones that are 6 by 6 by 6 and some that are not even rectilinear.

IBM's Site at http://www.research.ibm.com

A few sites tell the story of the 6 piece Burr, but in my opinion, none is better than IBM site: http://www.research.ibm.com/BurrPuzzles.  I first discovered this site as a fantastic way to understand the history, the mathematical terminology and the huge variety of Burr puzzles, all made up from six rods.  I believe the site was an early experiment in cloud computing, which I find very purposeful and successful.  This predates the wilder experiments such as "Watson" which many of you might be familiar with from Jeopardy.  This site has not only the history, some of which I referenced above, but all the definitions and detailed descriptions of the mathematical nomenclature.  The site also has a burr calculator to help you design your own puzzles, or even solve the ones you have that you simply cannot figure out how to put back together.  It is the first stop for any novice burr puzzler, and the reference that everyone still uses, although many of the links are outdated because IBM does not maintain the site.a quick Google search will fill in the gaps.  and i will cover some of my other favorite sites in a future blog.

Thursday, April 5, 2012

My First Puzzles

Cube Kumiki
I was too young to truly remember when I received my first puzzle.  In the 60's, there were a number of small wooden puzzles coming from Japan.  Not sure if my parents first got them in Japan on a trip or in Hawaii, while Dad was stationed there.  The first puzzles were a ball and a cube.  The are called kumiki puzzles, and were made of basswood or something similar.  Today they are abundant but still highly collectible.  Besides the geometric shapes, many of them are of animals, with some of my first being a dog and an elephant. I guess I had about 6 before I was 10 years old, and for the longest time that was my entire collection.  You figure, that was before the internet, before I had money and before I started my own travels of the world.  The world was small then.

The best kumiki puzzles today come from the Yamanaka Kumiki Works Inc. http://www.dento.gr.jp/yamanaka/index2.html.  Their Masters hand down the tradition through generations and the puzzles they make are excellent.  I do not really know the source of my original kumiki puzzles, but I recall endless time spent solving them and they have been prized possessions for almost 50 years. The animals and shapes may not always be considered true burrs, they represent the same concepts and the root of the dream.  I now have a few dozen of these style puzzles that I collected them later in life, and many of these kumiki puzzles are indeed burrs, , but I think my parents thought animals and geometric forms would be more enjoyable and inspirational for a young boy.  I guess they were right.

Sphere Kumiki
Today there are versions which come from other countries, mostly made of fruitwood, but some of the original types are still available.  One of the best sources is Cleverwood http://www.cleverwood.com/kumiki.htm  and Puzzle Box World http://www.puzzleboxworld.com/japanese-kumiki-puzzles.htm.  Both these sites have great histories of the  Kumiki Puzzles and the craftsmanship of Japanese joinery is work renown.

The 1st master of Yamanaka Kumiki Works was Tsunetaro Yamanaka who was born in 1874 in Odawara.  At first he studied under "Awabiya", and studied under famous master Hikotaro Kondo.  In 1897, he established the workshop making wooden box pillows and later shifted to "Kumiki".  Traditionally, "Kumiki" had comparatively simple shape such as square or round shape. which he changed the structure and form, and made the basis of today's various "Kumiki". (See the Yamanaka Kumiki Worsk Website)


These puzzles inspired generations of puzzle collectors, myself included. i wish i knew more of the history and traditions of kumiki.  One of my bucket list items is to be able to spend some time during my next trip to Japan to go to Hakone, and Kanagawa-ken which is the birthplace of kumiki puzzles, and where most of the true master artists still live and work today. Anyone wanting to help organize a trip, please count me in.

Wednesday, April 4, 2012

Getting Started

Not sure where to begin, except to say that this is a journey that I have been on for quite a while and with the encouragement of many people, I am finally going to begin to share with you.  I think this is a stream of consciousness, rather than a blog.  To understand the journey and the path I travel you might have to start at the beginning with me.  I will try not to lose you along the way.

6 Piece Puzzle Burr by Tom Lensch
This is a project I have sketched in bars, hotels, planes and trains, so some of it was alcohol enhanced, and I have forgotten as much as I remembered except for the few sketches that survived thru the end of each night during my travels. It started as a way to pass time and dream about a concept.  Any architect knows the thought.  It is a feeling and a passion, but one that I never really thought I could pull off.  The pace of life, work and family always had a priority.  Finally, though the gift of a 6 week sabbatical granted to me as an employee of Autodesk after 4 years,  I find myself with a unique opportunity to attempt to fulfill a dream.

Simply stated,  I am going to build a puzzle.   Not your average puzzle.  And to say it will be life-size might be an understatement.  It is a puzzle designed using the concepts of a burr puzzle.  A cabin to live in. One that is all wood joinery with no nails and no fasteners.  In time I will explain the burr concept, and the design will reveal itself.  Not all has been worked out, so who knows maybe you all can help me make it.  And yes, "you all" is a correct term in the words of my Virginia and Georgia relatives.

For those who encouraged me to blog this journey, hop on.  I hope you enjoy the ride.  For the new friends I hope I find along the way, please be patient.  This is the prologue and it will take me time to unfold my story.  My journey begins the first of May, 2012, and I still have work to do to prepare.